As a game developer with a long history of unfinished projects, I’m thrilled to share the journey of creating “One Bullet Ship,” my most finished game to date. Recently released in early access on itch.io, this arcade-style shooter signifies a culmination of my experiences and a focused approach to game design. Let me take you through the thought process, development challenges, and design decisions that brought this game to life.
The Genesis of One Bullet Ship
Finding Focus in Simplicity
After years of working on complex prototypes ranging from 2.5D platformers to online RPGs, I realized that my tendency to over-scope was holding me back. With “One Bullet Ship,” I decided to embrace simplicity. The core concept was straightforward: create a game that’s easy to understand but hard to master, where player skill truly matters.
The One-Bullet Mechanic
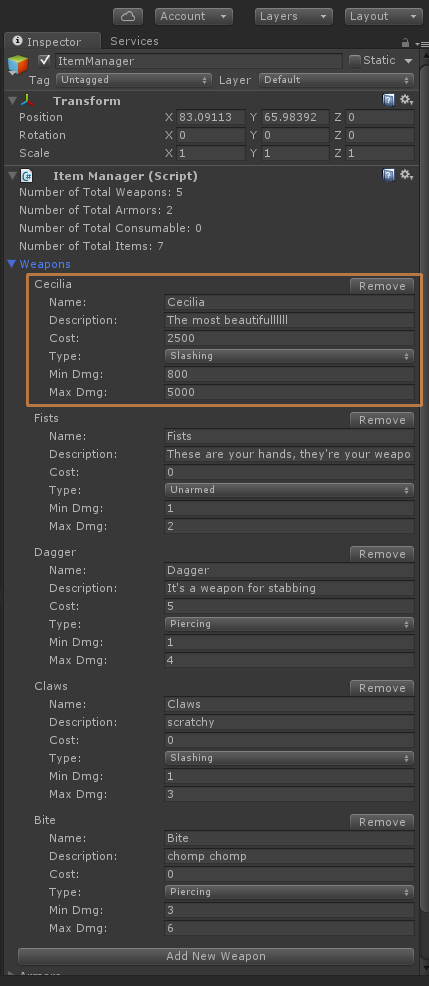
The defining feature of the game – having only one active bullet at a time – emerged from this philosophy. Players use arrow keys to fire in four directions, but once a bullet is fired, they can’t shoot again until it leaves the screen. This simple constraint creates a deep, engaging gameplay loop where every shot matters.
Design Philosophy
Player Responsibility
One of my primary goals was to make players feel responsible for their mistakes. The one-bullet mechanic achieves this beautifully. When players miss a critical shot or fire in the wrong direction, there’s a palpable “DOH!” moment. Testers consistently reported feeling that their failures were their own, not the result of unfair game design.
The “One More Round” Factor
I wanted “One Bullet Ship” to be addictive in the best way possible. The upgrade system plays a crucial role here. Every action in the game earns currency, which can be spent between rounds on upgrades like increased bullet damage or power-up frequency. This creates a compelling loop of play, earn, upgrade, and repeat.
Respecting Player Time
With most playthroughs lasting 1-3 minutes, the game is perfect for quick sessions. But, I didn’t want returning players to feel like they were always starting from scratch. The Score Multiplier System and Wave System work together to guarantee that upgraded players can quickly reach challenging levels while still having the opportunity to earn high scores.
Development Insights
Unity: A Long-Time Companion
As a Danish developer, I’ve had a special connection with Unity since its early days as a Mac-only program. When it finally came to Windows in 2009, I jumped at the chance to use it. Over the years, I’ve seen Unity evolve, and it’s been my go-to engine for many prototypes and experiments.
Overcoming the Completion Hurdle
“One Bullet Ship” represents a significant milestone for me – a game that made it past the prototype stage. By setting a clear, limited scope and focusing on core gameplay rather than expansive features, I managed to push through to completion.
The Player Experience
Achieving Flow
Perhaps the most rewarding feedback I’ve received is that players often enter a zen-like state of flow while playing. The intuitive controls, coupled with the constant decision-making required by the one-bullet mechanic, create a deeply engaging experience.
Audio Enhancement
I was fortunate to license music from a friend at Scarlet Moon Productions, which adds another layer of polish and immersion to the game.
Looking Ahead
With “One Bullet Ship” now in early access, I’m excited to gather more player feedback and continue refining the experience. This project has taught me valuable lessons about scope, design focus, and the power of simple yet deep mechanics.
Remember, every shot counts, every play earns upgrades, and hopefully, you’ll find yourself in that satisfying flow state that makes “just one more round” irresistible. Give it a try and let me know what you think!
11 simple and easy tricks for Unity3d 2d game development.
Are you looking for ways to improve your 2D games in Unity3D? Check out these useful tricks for optimizing performance, creating compelling visuals, and enhancing gameplay
1. Use the Sprite Packer to improve performance by packing multiple sprites into a single texture atlas.
The Sprite Packer can improve the performance of your 2D game by reducing the number of draw calls required to render the sprites, which can help improve the frame rate of your game. To use the Sprite Packer, first select the sprites you want to include in the atlas by either selecting them in the Project window or in the Scene view. Then, go to “Edit > Pack Sprites” or right-click the selected sprites and choose “Pack Sprites” from the context menu. This will create a new sprite atlas asset in your project that contains all the selected sprites. You can then use this atlas in your game by assigning it to a Sprite Renderer component as the “Sprite” field.
2. Use Sorting Layers and Order in Layer to control the rendering order of sprites.
Sorting Layers and Order in Layer are particularly useful when you have sprites that overlap and you want to ensure that they are drawn in the correct order. For example, you might want to ensure that a character sprite is always drawn in front of the background. To use Sorting Layers and Order in Layer, first create a new Sorting Layer by going to “Edit > Project Settings > Tags and Layers” and adding a new layer in the “Sorting Layers” list. Then, select the Sprite Renderer component of the game object you want to change the rendering order of, and set the “Sorting Layer” field to the layer you just created. You can then use the “Order in Layer” field to specify the rendering order within that layer, with lower values being rendered first.
3. Use Sprite Masks to hide or reveal parts of sprites.
Sprite Masks are useful for creating a variety of visual effects, such as vignette effects around the edges of the screen or revealing parts of a sprite as it is collected by the player. To use Sprite Masks, first create a new Sprite Mask component by selecting “Component > Miscellaneous > Sprite Mask” in the menu or by right-clicking the component list in the Inspector and choosing “Sprite Mask” from the context menu. You can then assign a sprite to the “Mask Graphic” field to use as the mask. Any objects that are behind the mask will be hidden from view, while objects in front of the mask will be visible.
4. Use Sprite Animations to create simple animations by flipping through a series of sprites.
Sprite Animations are a quick and easy way to create simple animations such as character movement or object interactions. To use Sprite Animations, first create a new Animation Clip by going to “Asset > Create > Animation” in the menu or by right-clicking in the Project window and choosing “Create > Animation” from the context menu. Then, select the Sprite Renderer component of the game object you want to animate, and drag the Animation Clip asset onto the “Animation” field in the Inspector. You can then use the Animation window (Window > Animation) to create a series of keyframes that flip through different sprites to create the animation.
5. Use Physics Materials to control the physics properties of colliding objects, such as bounciness and friction.
Physics Materials are useful for creating realistic physical interactions, such as a ball bouncing off a surface or an object sliding along a floor. To use Physics Materials, first create a new Physics Material asset by going to “Asset > Create > Physics Material” in the menu or by right-clicking in the Project window and choosing “Create > Physics Material” from the context menu. Then, assign the Physics Material asset to the “Material” field of the Collider component on the game object you want to modify the physics properties of. You can then adjust the “Bounciness” and “Friction” properties of the Physics Material to control how it reacts to collisions.
6. Use Box Colliders and Polygon Colliders to define the shape of game objects and control how they interact with other objects in the scene.
Box Colliders and Polygon Colliders are used to define the shape of game objects and control how they interact with other objects in the scene. To use Box Colliders and Polygon Colliders, add a Collider component to the game object you want to define the shape of. Select either the “Box Collider 2D” or “Polygon Collider 2D” option from the “Type” dropdown to specify the type of collider you want to use. For Box Colliders, adjust the “Size” and “Offset” properties to control the shape. For Polygon Colliders, use the “Edit Polygon” button to manually specify the shape by clicking to add points.
7. Use Layer-Based Collision Detection to control which game objects can collide with each other.
Layer-Based Collision Detection allows you to control which game objects can collide with each other. To use Layer-Based Collision Detection, first create a new layer by going to “Edit > Project Settings > Tags and Layers” and adding a new layer in the “User Layers” list. Then, select the game objects you want to include in the layer and set the “Layer” field in the Inspector to the new layer. You can then use the “Layer Mask” field of the Collider component to specify which layers the collider should collide with.
8. Use Trigger Colliders to create events that are triggered when a game object enters or exits a collider.
Trigger Colliders are used to create events that are triggered when a game object enters or exits a collider. To use Trigger Colliders, add a Collider component to the game object you want to use as the trigger, and check the “Is Trigger” checkbox in the Inspector. You can then create a script that contains a function with the “OnTriggerEnter2D” or “OnTriggerExit2D” signature, and attach the script to the game object. This function will be called whenever another collider enters or exits the trigger collider.
9. Use Raycasts to detect objects in the scene and perform actions based on their presence or absence.
Raycasts are used to detect objects in the scene and perform actions based on their presence or absence. To use Raycasts, you can use the “Raycast” function of the “Physics2D” class, which returns a “RaycastHit2D” object containing information about the object that was hit by the ray. You can use this information to perform actions such as detecting when the player clicks on an object or when an enemy collides with a wall.
10. Use Particle Systems to create special effects such as explosions, smoke, and sparks.
Particle Systems are used to create special effects such as explosions, smoke, and sparks. To use Particle Systems, first create a new Particle System by going to “GameObject > Particle System” in the menu or by right-clicking in the Hierarchy and choosing “Particle System” from the context menu. You can then use the Inspector to customize the appearance and behavior of the Particle System, such as the type of particles, the emission rate, and the lifetime of the particles.
11. Use Tilemaps to quickly create levels using pre-made tiles, and use Tilemap Colliders to define the shape of your level and make it interact with other objects in the scene.
Tilemaps are used to quickly create levels using pre-made tiles. To use Tilemaps, create a new Tilemap by going to “GameObject > 2D Object > Tilemap” in the menu or by right-clicking in the Hierarchy and choosing “2D Object > Tilemap” from the context menu. Customize the properties of the Tilemap in the Inspector, such as the size of the tiles and the offset of the grid. Use the Tile Palette window (Window > 2D > Tile Palette) to create and paint tiles onto the Tilemap. To make the Tilemap interact with other objects in the scene, add a Tilemap Collider component to the Tilemap game object. This will create a collider for each tile in the Tilemap, allowing other colliders to interact with them.
By using these tricks, you can take advantage of powerful features such as the Sprite Packer, Sorting Layers, Sprite Masks, and more to elevate your 2D games to the next level. Whether you’re a beginner or an experienced developer, these tips and techniques can help you get the most out of Unity3D.
When it comes to game development, there are a lot of different tools and software that you can use – some of which are free. In this blog post, I’m going to take a look at the top five free software for game development, so that you can get started on your next project.
1. Unity 3D
Unity 3D is a powerful game engine that can be used for a variety of different game genres. It’s also free to download and use, making it a great option for beginner and experienced developers alike.
2. Unreal Engine 4
Unreal Engine 4 is another popular game engine that offers high-end graphics and features. It’s also free to download and use, although you’ll need to pay a 5% royalty on any games that you release.
3. Godot
Godot is a free and open source game engine that’s designed for 2D and 3D game development. It’s easy to use and learn, making it a great option for those just getting started with game development.
4. GameMaker
GameMaker is a popular game development tool that allows you to create 2D games with ease. It has a drag-and-drop interface that makes it easy to use, even for those with no programming experience.
5. Construct 2
Construct 2 is another great option for those looking to create 2D games. It’s easy to use and comes with a lot of great features, making it a great choice for beginner and experienced developers alike.
Star Dasher is now in Open Beta, meaning you can join the beta test and play my new mobile game before it officially releases. 😎
It is a 3d Endless Runner where you control a spaceship with your finger, moving it across the screen to avoid incoming obstacles while picking up coins. Spend your hard earned credits to unlock new spaceships that allow you score more points and get further into the game.
Star Dasher originally started as a learning experience for me, where I wanted to learn how to make an android mobile game and also learn how to publish an android game to the Google Play store.
I’ve spent roughly 2 months on it, and it is safe to say that the 90/10 rule was in full effect. I am not finished with the game, but it’s quite obvious at this point that the last 10% of the game, finishing it, polishing it, bug fixing it, is going to take up 90% of the game’s production time. 😵
So if you’re an Android User and want to play an endless runner where actually get points for narrowly dodging things, give Star Dasher Open Beta a go and let me know what you think. Help me test it before It is released next month.
How do you make a 2D Endless Runner Game in Unity?
I see this question every day.
Have a look at this search on youtube, that place is packed with a gazillion tutorials on every subject and more!
“How do I know if the tutorials are good?” you might ask?
Well, you cant really know for sure. After a while you’ll learn which Youtubers are great, like BlackThornProd, and which are AMAZING like Brackeys.
BUT… Sometimes you just want to have it all in one place, and that’s where SkillShare saves the day.
You can learn all kinds of things there, like Marketing, Programming, Drawing, Design, Game Development, even things like Instagram or getting into specifics on programs like Adobe Photoshop or Illustrator.
Why am I showing you this?
‘Cause my Free Spacerunner graphics pack was recently used in a SkillShare course by SandS Arts and I wanted to share it with you all 😀 So check out the course at SkillShare and get 2 free months of premium where you can learn anything you want!
Rise my minion! *Tastygraph casts a resurrection spell on this blog*
Hi everyone…
it has been ages…
years in fact…
and for that I apologize (Lets face it, its not like you were holding your breath, waiting for a new update… if so… then… yikes, I hope this resurrection spell affects you too then, my poor zombie friend 😉 )
So what does a Tastygraph do in about 4 years?
We’ll I’ve worked hard at becomming better at programming.
I’ve practiced my 2d drawing skills and managed to save up money for a Wacom Cintiq13HD drawing tablet, bought a spanking new supercomputer and a whole bunch of other things(tm)…
Been promoted at work to now be a part time school teacher as well, so I am in charge of planning and teaching the computer science classes for the 5th graders (the only grade that is taught computer science at this school)
I’ve managed to release a few games on my Kongregate Page and I have also started livestreaming my game development sessions which you’ll be able to watch on my Twitch Channel (its like a television program where you watch whats happening on my screen while im explaining what I am doing 🙂 )
oh… and as a little visual proof of concept, so you can see that I havent been completely slacking off! Here’s a video of what my super mario / meatboy and zelda2 inspired 2d platformer currently looks like 🙂 (This is after 2 months of work)
is my latest game, which… really isnt much of a game, but more of a test in using one of the best/fastest/free’est game development tools out there… www.stencyl.com 🙂
I was at the annual obligatory (aka, you must attend, or you’ll be fired!) Summer Camp with my work… 5 days of no interwebz, getting paid 10 hours for a 24 hour workday… surrounded by screaming hyperactive kids that have been injected with ridiculously high amounts of sugar in every fucking meal! (thanks boss, you really know how to feed kids properly… but thats an entirely different story 😛 )
Anyways… im stuck at this thing… brought my laptop… and decided to make a little game to kill time during the extremely late hours of the night (seemingly my only moment of solitude/freedom on the entire trip… is when everyone is asleep and im not 🙂 )
it took about 1½-2 hours or so… and then a few more hours here and there to tweak the gameplay (if you can call it that… )
Its basically a super simple avoidance game where you control the character with the arrow keys, avoid the randomly flying red alien heads while trying to manouver over and pick up the hastily scribbled powerup icon to boost your score 🙂
In other news… I am now kind of torn between the ease and flash… (and the potential for iPhone game development on a PC platform for a price) of www.stencyl.com …
and the super power, 3d and 2d capabilities, multiplatform (for a price) and huge amounts of SERIOUS users of www.unity3d.com
Both programs are great for someone like me, but in the end, i think that www.stencyl.com is a better program for me, in my current “level” of game-designer… I’m better at focusing my attention to finishing a super easy , super quick game… and for that, StencylWorks is awesome 🙂
Dont get me wrong, www.unity3d.com is terrific for that as well, but its somewhat faster to develop with Stencyl, compared to Unity3d… for me.
anyways… loads of blah blah this time… check out the game to get a feel for what is possible with Stencyl in a very limited amount of time 🙂
Figured it was time to show a little somewhat buggy sneak peek of an arena shooter set in space that I am currently working. (read: Currently pulling my hair out because SOMETHING just wont do what I want it to 😛
This test is NOT a proper indication of how the game will play when its finished. All the graphics will be replaced, and Joshua from http://www.openheartsound.com is working on the Music and Sound Effects for the game (I’ve added a few of his sounds to the game already (the laser shot, the upgrade sound and the pick up Ore sound… and damn, is he good!! )
also, in the final version of the game, you wont be fighting all enemy types from the get go… it will slowly ramp up the difficulty as you upgrade your ship and kill more enemies.
as always, the game requires the Unity3d Plugin to play in your browser, luckily its a super fast download and no hassle install 🙂
Just wanted to share a little something, to show that I’m not completely inactive 😉
Great news though… Learned a crapton of coding stuff, became a Moderator on http://www.Kongregate.com (one of the largest flash gaming communities) aaaaaand… Kongregate finally accepts Unity3d games to its portal 🙂
So I am happy to announce that Bump n Drop can be played on Kongregate now, and even happier to announce that Bump n Drop is currently ranked in the top 10 of the Unity games on the site… yay me 🙂